
| Figure 2-1-1 Main Window |

Figure 2-1-2 Disk ID

Figure 2-1-3 Directory Tree

| Figure 2-1-4 Directory Entry List |
This program is designed for creating the N64 Disk Drive RAM image data as a file on the PC (a computer running under Windows 95).
The data in the RAM area of N64 Disk Drive can be managed with a file system. With this program, you can use a PC file to create the image data for this file system.
| Figure 2-1-1 Main Window |
Figure 2-1-2 Disk ID
Figure 2-1-3 Directory Tree
| Figure 2-1-4 Directory Entry List |

Figure 2-1-5 Menu Bar
Left-click an item in the menu and a pull-down menu will appear below that item.
Depending on the situation, the various items in the pull-down menu may or may not be selectable.
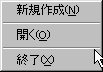
Figure 2-1-6 "File" pull-down menu
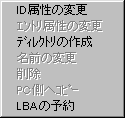
Figure 2-1-7 "Edit" pull-down menu

Figure 2-1-8 "Help" pull-down menu
The functions of the menu items are explained in Section 3, "Operating Procedures".

Figure 2-1-9 Pop-up menu
The functions of the menu items are explained in Section 3, "Operating Procedures".
This Section explains how to perform various actions with the functions in this program.
Select "New" from the "File" menu to open the "Create new image" dialog box. Enter the path name for the file that contains the new image data and the disk type, then click OK .
Please specify the file name with the full path. Any extension may be used for the file name, but we recommend using "img."

Figure 3-1-1 "Create new image" dialog box
Select "Open" from the "File" menu to display the "Read image file" dialog box. Select the image data file, then press "Open."
By default, files that do not have the ".img" extension are masked and not displayed in this dialog box. To a file with another extension, enter "*.*" then click OK. It is also possible to directly enter the name of the file you want to read and then click OK. If the specified file does not exist, an error will occur.
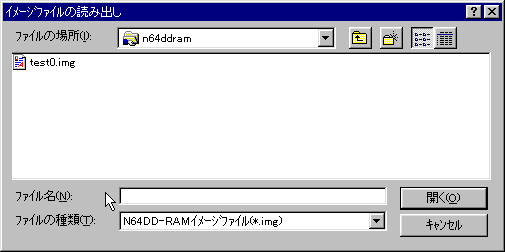
Figure 3-2-1 "Read Image File" dialog box
Open Explorer, select the file you want to copy; and then drag & drop it. It is copied to the directory that is currently selected in the directory tree. Note that this does not work like the normal Explorer and you cannot select the destination directory by dragging the file around in the directory tree.
Select the entry you want to copy in the directory tree or in the entry list. Then select "Copy to PC" from the "Edit" menu, or right-click to open the pop-up menu and then select "Copy to PC." The directory selection dialog box appears. Select the directory that will receive the file, then click OK.

Figure 3-4 "Select Copy Destination Directory" dialog box
Select the entry you want to delete in the directory tree or the entry list. Select "Delete" from the "Edit" menu, or right-click to open the pop-up menu and then select "Delete" from there. If a directory is selected, then all entries under that directory will be deleted.
Select the parent-directory for the directory you plan to create in the directory tree. Select "Create Directory" from the "Edit" menu, or right-click to open the pop-up menu and then select "Create Directory" from there. Enter the directory name in the dialog box that appears, then left-click the OK button..
Select the entry you plan to move in the directory tree or in the entry list. Drag the entry on the directory tree and Drop it onto the new parent directory.
Select the entry that you want to rename in the directory tree or in the entry list. Select "Rename" from the "Edit" menu, or right-click to open the pop-up menu. Select "Rename.". Since the selected entry name is now editable (see Figure 3-8-1), type in the new name and then press the Return key.
Select "Change ID Attributes" from the "Edit" menu, or left-click the disk ID, then right-click to display the pop-up menu. Select "Change Attributes." Make changes to the attribute values in the "Change ID Attributes" dialog box that appears, then click "Apply." If you click the "Cancel" button no changes will be made.

Figure 3-9-1 "Change ID Attributes" dialog box
Select the entry you want to change in the directory tree or in the entry list. Select "Change Entry Attributes" from the "Edit" menu, or left-click the disk ID, then right-click to display the pop-up menu. Select "Change Attributes." Make changes to the attribute values in the "Change Entry Attributes" dialog box that appears, then click the "Apply" button. If you click the "Cancel" button no changes will be made.
The date can be set in a range from 0:0:0 January 1, 1997 to 23:59:59 December 31, 2060.
Please enter the company code and game code with hexadecimal numbers. These are expressed with 4 digits and 8 digits, respectively, so if the entry does not fill the entire space, fill from the left with zeros (0).
The update counter and the copy limit number are expressed with decimal numbers.

Figure 3-10-1 "Change Entry Attributes" dialog box
If a directory is selected, and you mark the "Change all entries under directory" checkbox at the bottom of the dialog, then any attribute specified with the "Edit Entry" dialog will be set for all entries under that directory. This only works for those attributes that have marked checkboxes. This feature is useful when you want to set the same date for all entries below a given directory.
Select "Version" from the "Help" menu to view the "Version information" dialog box. Click "OK" to close the dialog box.
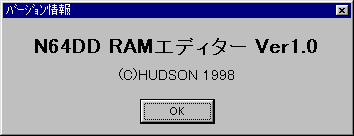
Figure 3-11-1 "Version Information" dialog box
To specify that the file system does not use a specified LBA, select "Reserve LBA" from the "Edit" menu to open the "LBA usage" window. LBA is reserved in this window. See Section 4 for details.
Click the X button in the upper-right corner of the main window or select "Exit" from the "File" menu.
When "Reserve LBA" is selected from the "Edit" menu in the main window, the window like that shown in Figure 4-1 appears. This is called the "LBA Usage" window. By manipulating this window, it is possible to prevent the File System from using a specified LBA. The specification can also be canceled from this window.

Figure 4-1. The "LBA Usage" window
Each colored square can be thought of as an LBA cell. Each cell expresses one LBA, and the color of the cell indicates the current status of that LBA.
White cells are LBA that are managed by the file system but have not been used yet.
Green cells are LBA reserved by the user.
Blue cells are LBA managed by the file system and already in use.
Red cells are LBA for which access has been disabled due to disk damage, etc. Naturally, cells of this color will not appear if this tool was used to create data from the start.
Light blue cells represent the selected area. This will be explained in 4-1.
The numbers down the left side and along the top express the LBA in each LBA cell. For example, the LBA in the LBA cell in row 1440, column 07 is LBA 1447.
The cursor sits above one LBA cell at a time, and that cell is highlighted in reverse-color. The cursor can be moved around using the keyboard arrow keys.
An entire area of LBA cells can be selected by pressing the Shift key while moving the cursor. The cells from the starting position to the current position of the cursor will change color to light blue. A light-blue cell is a selected cell, and in this state it can be reserved or unreserved. To cancel the selection, release the Shift key and move the cursor.
When an LBA is reserved, the File System can no longer use that LBA.
To reserve LBA, select the LBA cells (see Section 4.1 above) and then select "Reserve" from the "Edit" menu. The selected LBA are reserved and displayed in green. When an LBA is not selected, the operation acts on the LBA cell above which the cursor is currently resting.
Only LBA that are free and managed by the File System can be reserved with this operation. If any other type of LBA is selected, nothing will happen.
Canceling the reservation on a reserved LBA enables the File System to use that LBA.
To do this, select the LBA cell (see Section 4-1) and then select "Free up" from the "Edit" menu. The selected LBA reservation is canceled and the cell is displayed with white. When an LBA is not selected, the operation acts on the LBA cell above which the cursor is currently resting.
Naturally, cancellations can only be made for LBA that are currently reserved. . If a cancellation is attempted on any other type of LBA, nothing will happen.
The current version does not support the "Undo" function. Since an entry that is accidentally deleted cannot be recovered, please operate this tool very carefully. Also, because data is always saved to the original file during operations, you cannot "salvage" your work after making a mistake by closing the file without saving. In fact, because changes are always saved to the file, there is no basic "Save" function.
For this reason, we recommend that you create a backup before you begin editing data. Use Explorer of some such tool to create a copy of the image data file before you begin to work.
Also, try not to edit an important file the first time you operate this tool. It is better to start by creating a new file and practicing the basic operations there.
Please do not activate this program more than once and edit the same file in each program. The file will lose consistency and the data will become corrupted.
