6-3 Setting up
6-3-1 Setting up the Hardware
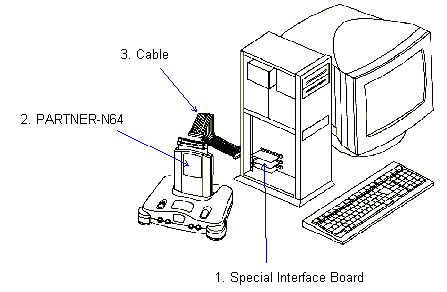
1. Install the PARTNER-N64 Interface Board
Connect the interface board provided with PARTNER-N64 to the ISA slot of the host machine (DOS/V) or to the C bus slot of PC-98.
2. Install the PARTNER-N64 Debugger
Insert PARTNER-N64 Debugger into the Game Pak slot of the Modified N64 Control Deck.
3. Install the Interface Board Cable
Connect between the 40-pin connector of the PARTNER-N64 Interface Board and the PARTNER-N64 I/F connector (40-pin) using the special cable provided.
|
|
| Copyright 1997 Kyoto
Micro Computer Co., LTD. |
Figure 6-3-1 The hardware setup
4. Install the Controller, video cable and AC adapter
After checking that the N64 Power switch is OFF, connect the Controller, a video cable (purchased separately) and the AC adapter.
6-3-2 Setting up the software
Carry out the software installation using the following procedure:
1. Install N64 OS (PC)
The N64 OS must be installed prior to installing PARTNER-N64 Debugger software. If you have not installed the N64 OS software on your PC, use the CD and installation instructions included in your N64 Software Development Kit to do so now. The microcode and sample program which are required for using N64 OS in the N64 application are contained on this CD.
2. Install PARTNER-N64PC Debugger and exeGCC Compiler
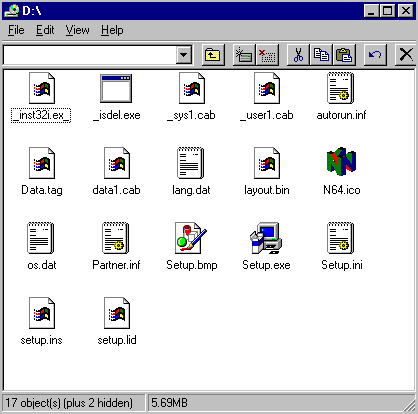
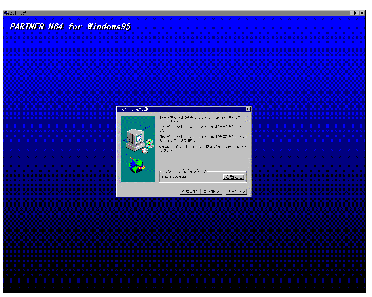
Install the PARTNER-N64PC Debugger software and exeGCC by inserting the CD into your CD-ROM drive. If Setup does not run after a few seconds, double-click Setup.exe in your CD-ROM directory.

Figure 6-3-1 The contents of CD-ROM directory
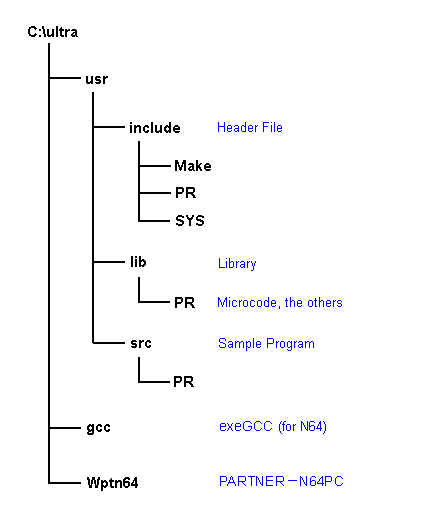
PARTNER-N64PC files are installed in "c:\ultra\WPTN64" by default.

Figure 6-3-2 The PARTNER-N64 install screen
The following is the directory configuration after the installation:

|


